 Skip to content
The angle chart for crown molding is an indispensable tool for achieving precise and professional-looking crown molding installations. This guide will delve into the components, applications, and alternative methods of using an angle chart, empowering you with the knowledge to execute flawless crown molding projects.
Whether you’re a seasoned DIY enthusiast or a professional contractor, understanding the intricacies of crown molding angles is crucial for a seamless and visually appealing finish.
Angle Chart Components

An angle chart for crown molding is a valuable tool for determining the appropriate angles to cut the molding pieces for a professional-looking installation.
The chart typically consists of the following sections:
- Angle Finder:This section provides a series of angle measurements that correspond to different crown molding profiles and ceiling heights.
- Miter Angle:This section shows the angle at which the molding pieces should be mitered to form a 90-degree corner.
- Bevel Angle:This section indicates the angle at which the molding should be beveled to fit against the ceiling or wall.
Types of Angles Used in Crown Molding
The angle chart for crown molding accounts for the different types of angles used in crown molding installation:
- 90-Degree Corner:This is the most common angle used in crown molding installation, where two pieces of molding meet at a right angle.
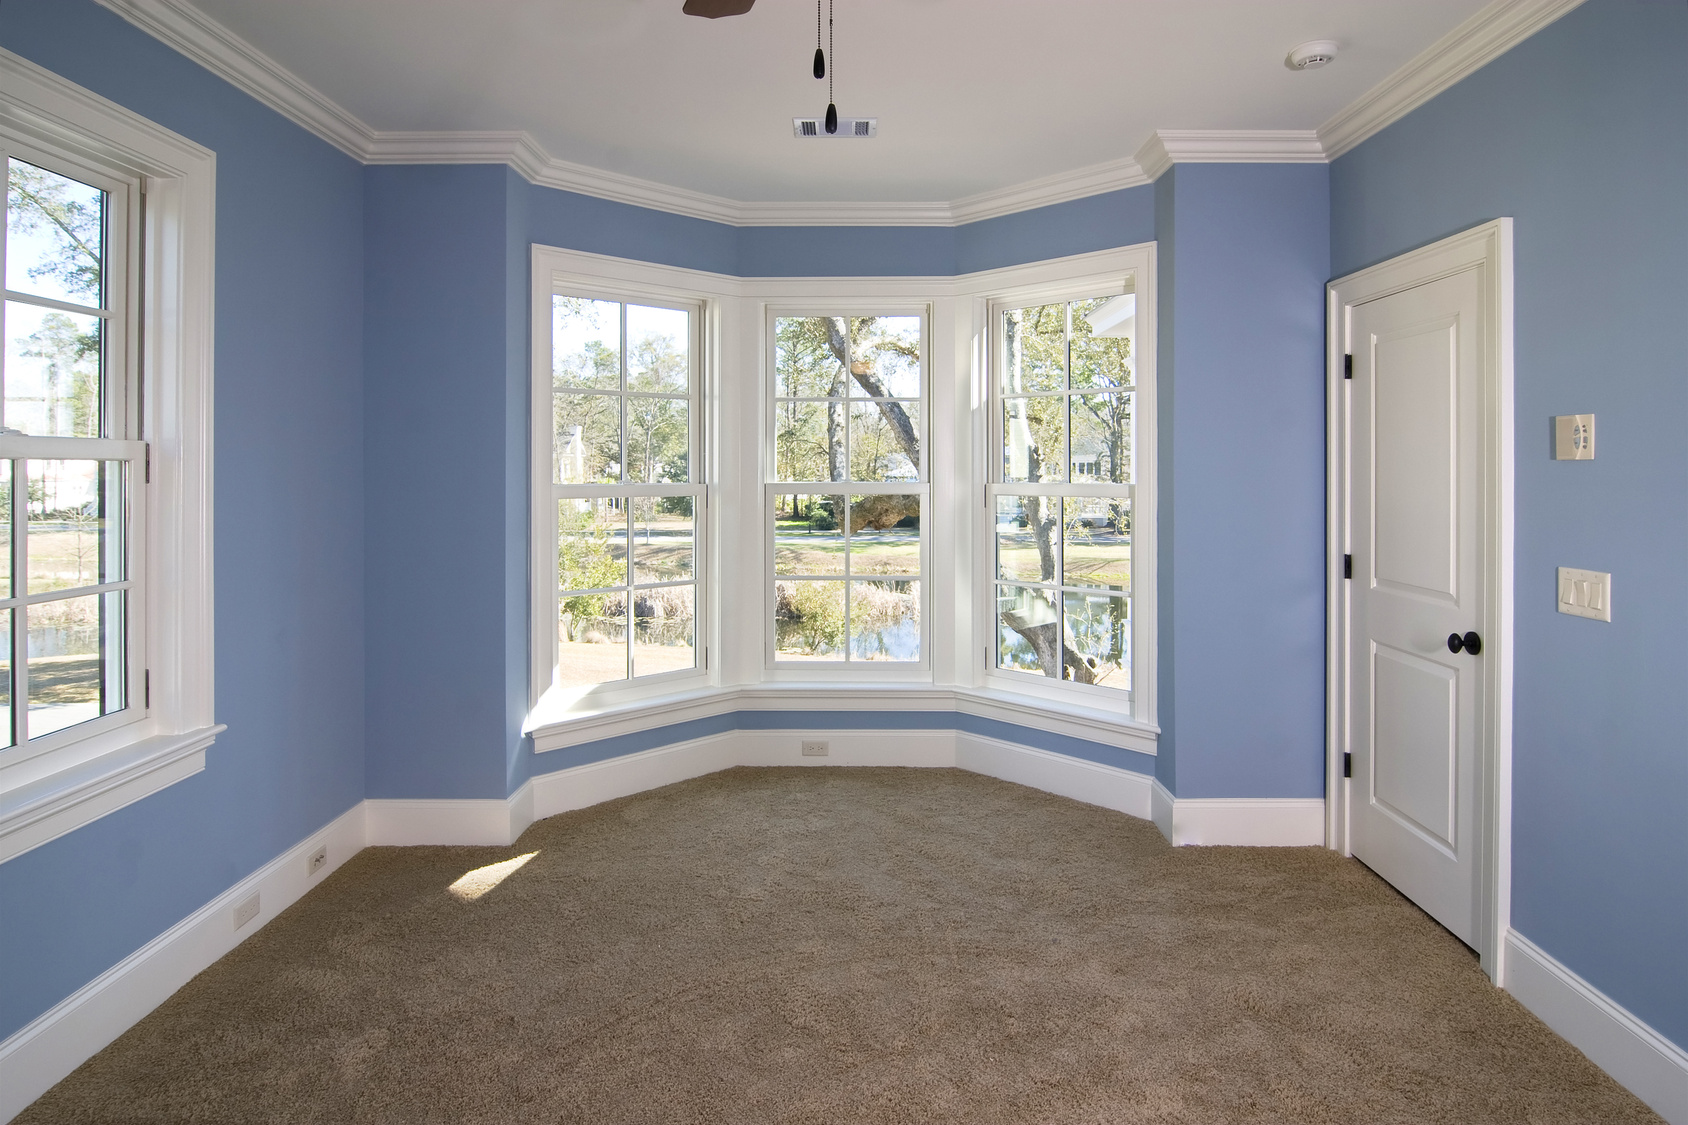
- 45-Degree Corner:This angle is used when molding pieces meet at a 45-degree angle, such as in a bay window or corner with an angle other than 90 degrees.
- Spring Angle:This angle is used to cut the molding so that it fits snugly against a curved surface, such as a curved ceiling or bay window.
Using the Angle Chart

The angle chart is a valuable tool for determining the correct angles for crown molding. It provides a comprehensive guide to the various angles used in crown molding installations, making it easy to achieve precise and professional-looking results.
When working with crown molding, an angle chart is an invaluable tool. This chart provides the precise angles needed for cutting the molding to fit seamlessly. Similarly, the stonington maine tide chart is a useful guide for predicting the tides in that area.
By referencing an angle chart for crown molding, you can ensure that your cuts are accurate and your molding fits perfectly.
To use the angle chart, simply follow these steps:
Reading the Chart
- Locate the row corresponding to the angle of the wall where the crown molding will be installed.
- Read across the row to find the corresponding angle for the miter cut on the crown molding.
Using the Chart for Miter Cuts
- Determine the angle of the wall where the crown molding will be installed.
- Refer to the angle chart to find the corresponding angle for the miter cut on the crown molding.
- Set your miter saw to the correct angle and make the miter cut.
Tips for Using the Chart
- Use a sharp pencil or marking tool to ensure accurate measurements.
- Double-check your measurements before making any cuts.
- Practice making miter cuts on scrap pieces of crown molding before working on the actual installation.
Applications of the Angle Chart

The angle chart is a practical tool that can help you tackle various challenges in crown molding installation. It provides a quick and easy way to determine the angles needed for cutting and fitting crown molding, even in complex installations.
For your upcoming home improvement project, it’s crucial to choose the right angle chart for crown molding. By selecting the appropriate angles, you can achieve a seamless and elegant transition between walls and ceilings. To help you with this task, you can refer to a vina robles amphitheatre seating chart for inspiration.
These charts provide detailed angles for different molding profiles, ensuring a precise fit and a professional-looking finish.
Problem-Solving with the Angle Chart
The angle chart is especially useful for solving common problems in crown molding installation, such as:
- Calculating the angle for inside and outside corners
- Determining the angle for miter cuts on crown molding
- Adjusting the angle for non-standard ceiling heights or wall angles
Creating a Custom Angle Chart

Customizing an angle chart offers several advantages. It allows you to tailor the chart to specific project requirements, ensuring accurate and efficient angle calculations. Additionally, creating a custom chart empowers you to incorporate project-specific details and preferences, such as using specific units of measurement or including additional angles for non-standard moldings.
To create a custom angle chart, you can utilize spreadsheet software or other tools that provide graphing capabilities. Begin by setting up a table with two columns: one for the angle measurement and the other for the corresponding angle setting on the miter saw.
Factors to Consider
- Project Requirements:Determine the specific angles needed for the project, considering the molding type, wall angles, and any non-standard cuts.
- Units of Measurement:Choose the units of measurement for the angles, such as degrees or radians, and ensure consistency throughout the chart.
- Miter Saw Capabilities:Check the limitations of your miter saw and ensure that the chart covers the range of angles that can be cut with the saw.
- Additional Angles:Consider including angles for non-standard moldings or specific project needs, such as crown molding with a non-90-degree profile.
Alternative Methods for Determining Angles: Angle Chart For Crown Molding

In addition to using an angle chart, there are several alternative methods for determining the correct angles for crown molding.
These methods include using a protractor or a miter saw. Each method has its own advantages and disadvantages, and the best method for a particular situation will depend on the specific needs of the project.
Using a Protractor
A protractor is a tool that is used to measure angles. To use a protractor to determine the angle for a crown molding cut, first place the protractor on the molding so that the 0-degree mark is aligned with the edge of the molding.
Then, rotate the protractor until the desired angle is aligned with the other edge of the molding. The angle can then be read from the protractor.
Using a Miter Saw, Angle chart for crown molding
A miter saw is a power tool that is used to make precise cuts at specific angles. To use a miter saw to determine the angle for a crown molding cut, first set the saw to the desired angle.
Then, place the molding on the saw table and align it with the saw blade. Finally, lower the saw blade to make the cut.
.gallery-container {
display: flex;
flex-wrap: wrap;
gap: 10px;
justify-content: center;
}
.gallery-item {
flex: 0 1 calc(33.33% – 10px); /* Fleksibilitas untuk setiap item galeri */
overflow: hidden; /* Pastikan gambar tidak melebihi batas kotak */
position: relative;
margin-bottom: 20px; /* Margin bawah untuk deskripsi */
}
.gallery-item img {
width: 100%;
height: 200px;
object-fit: cover; /* Gambar akan menutupi area sepenuhnya */
object-position: center; /* Pusatkan gambar */
}
.image-description {
text-align: center; /* Rata tengah deskripsi */
}
@media (max-width: 768px) {
.gallery-item {
flex: 1 1 100%; /* Full width di layar lebih kecil dari 768px */
}
}

Our website has become a go-to destination for people who want to create personalized calendars that meet their unique needs. We offer a wide range of customization options, including the ability to add your own images, logos, and branding. Our users appreciate the flexibility and versatility of our calendars, which can be used for a variety of purposes, including personal, educational, and business use.


![BASD Calendar: Best Online Calendar for [Target Audience/Use Case]](https://lh3.googleusercontent.com/xsJ3CDJGVjb1sE6NU2BFvJuoFDpvPi0m7YLFiMvCLkLY0nTagixlDlFEQZAf7JF8Ijc=h900 "BASD Calendar: Best Online Calendar for [Target Audience/Use Case]")